This guide outlines the steps to install the WHMCS Mailcow module, enabling integration between WHMCS and your Mailcow email server. Follow these instructions carefully to ensure a successful setup.
Part 1: Downloading and Installing the Module
-
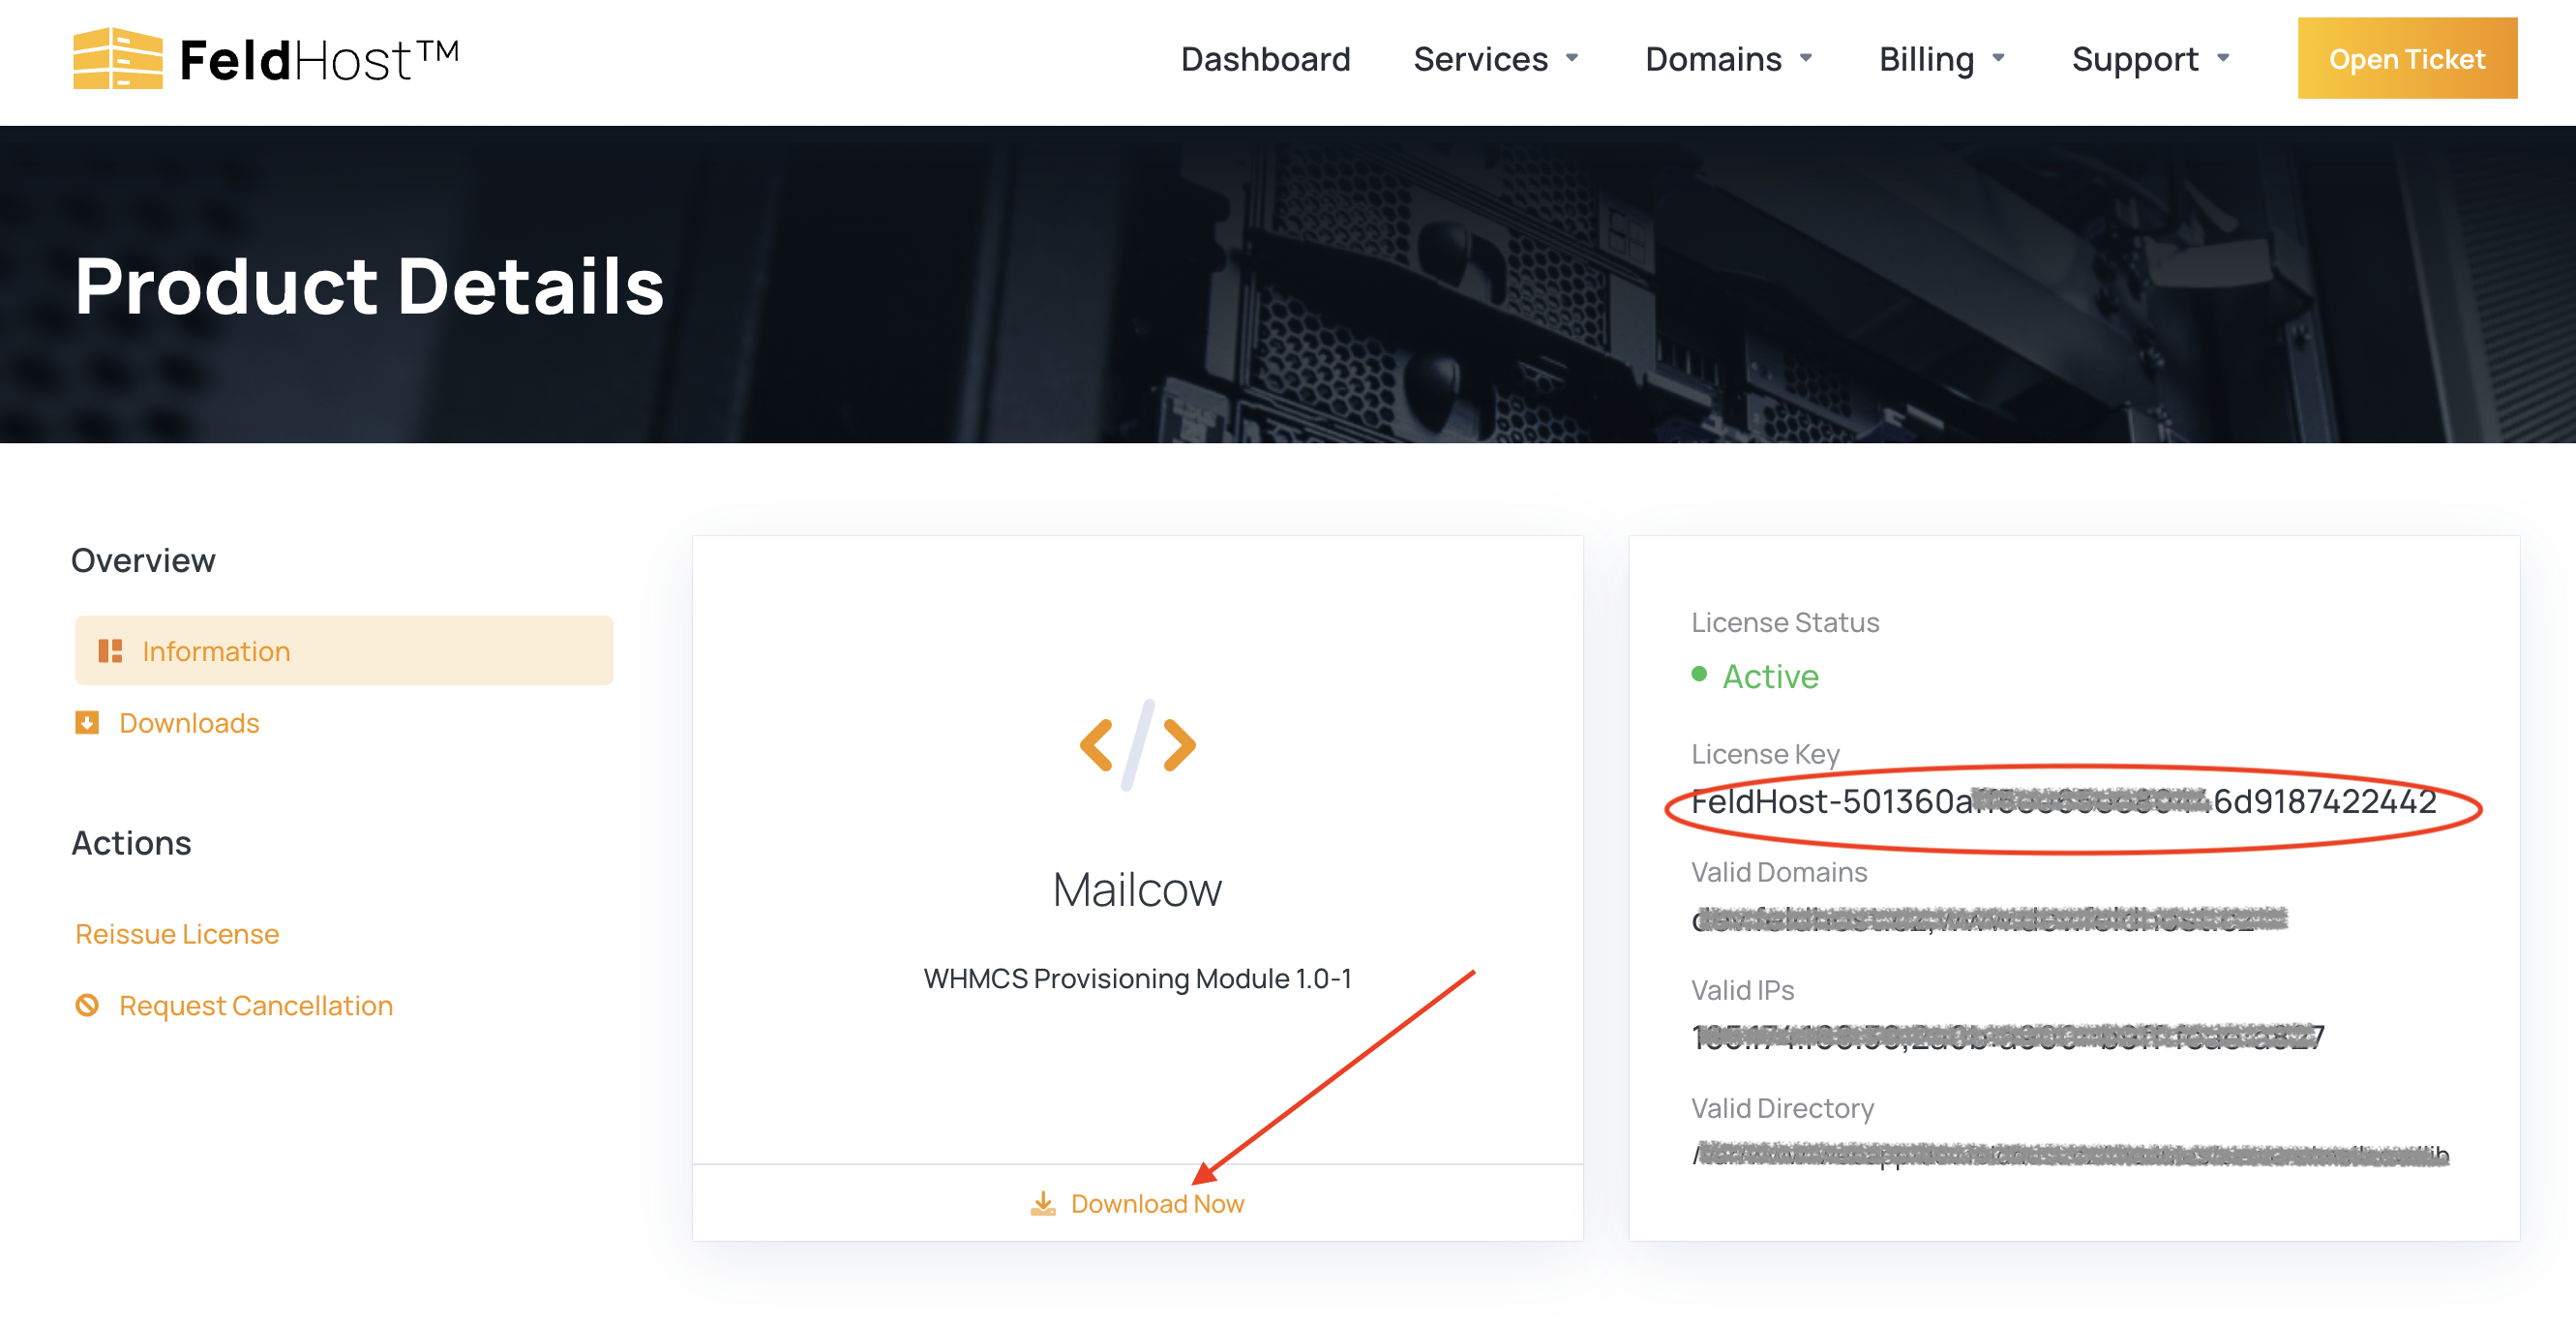
Accessing the Module: After your payment is processed and your order is activated, log in to your client area. Here, you will find the Mailcow module zip file available for download. Your unique License Key will also be displayed in this area.
-
Downloading and Unpacking: Download the Mailcow module zip file and unpack it on your local computer.
-
Preparing the License Key: Navigate to the
modules/servers/mailcowdirectory within the unpacked files. Create a new file namedlicensekey.txthere.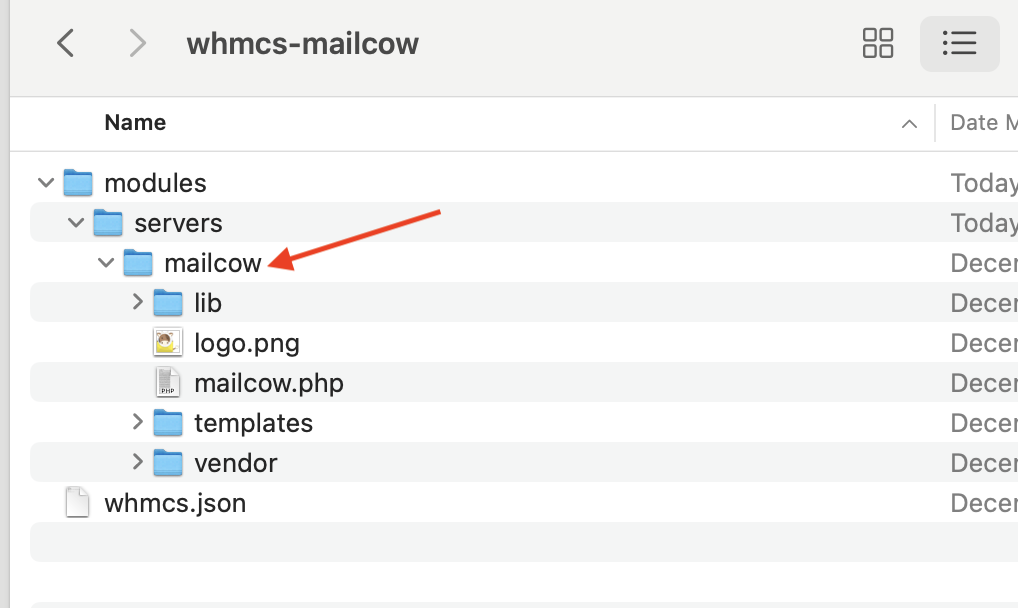
-
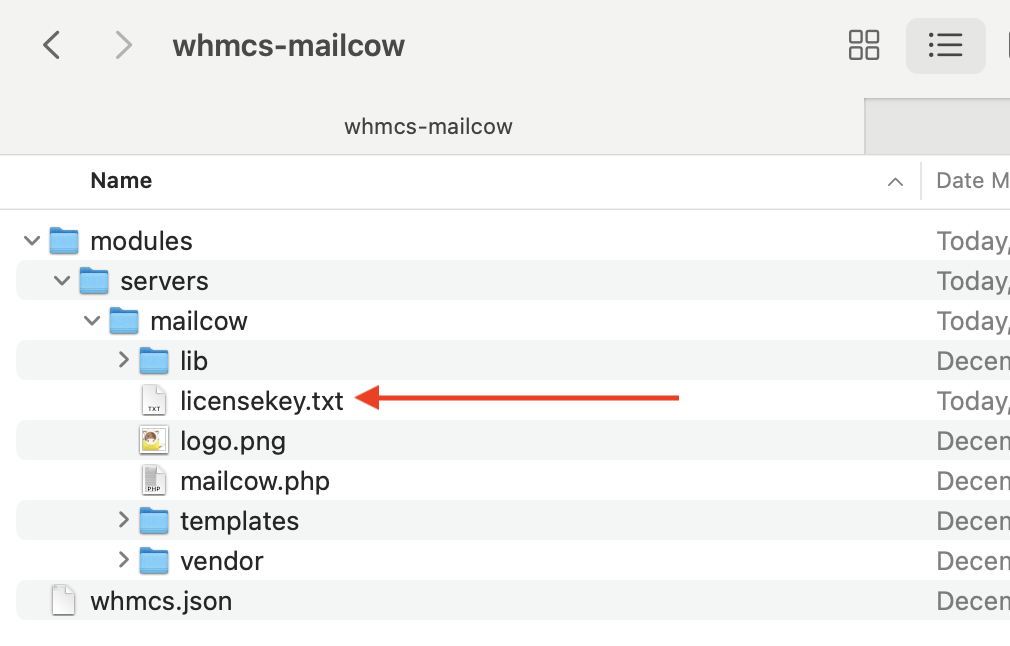
Entering the License Key: Open the
licensekey.txtfile and enter the License Key you found in your client area. -
Uploading the Module: Upload the entire module folder to the appropriate directory on your server where WHMCS is running.
Part 2: Creating API Access Hash in Mailcow
-
Logging into Mailcow: Log in to your Mailcow installation as an Admin user.
-
Accessing Configuration: Navigate to "System" -> "Configuration".

-
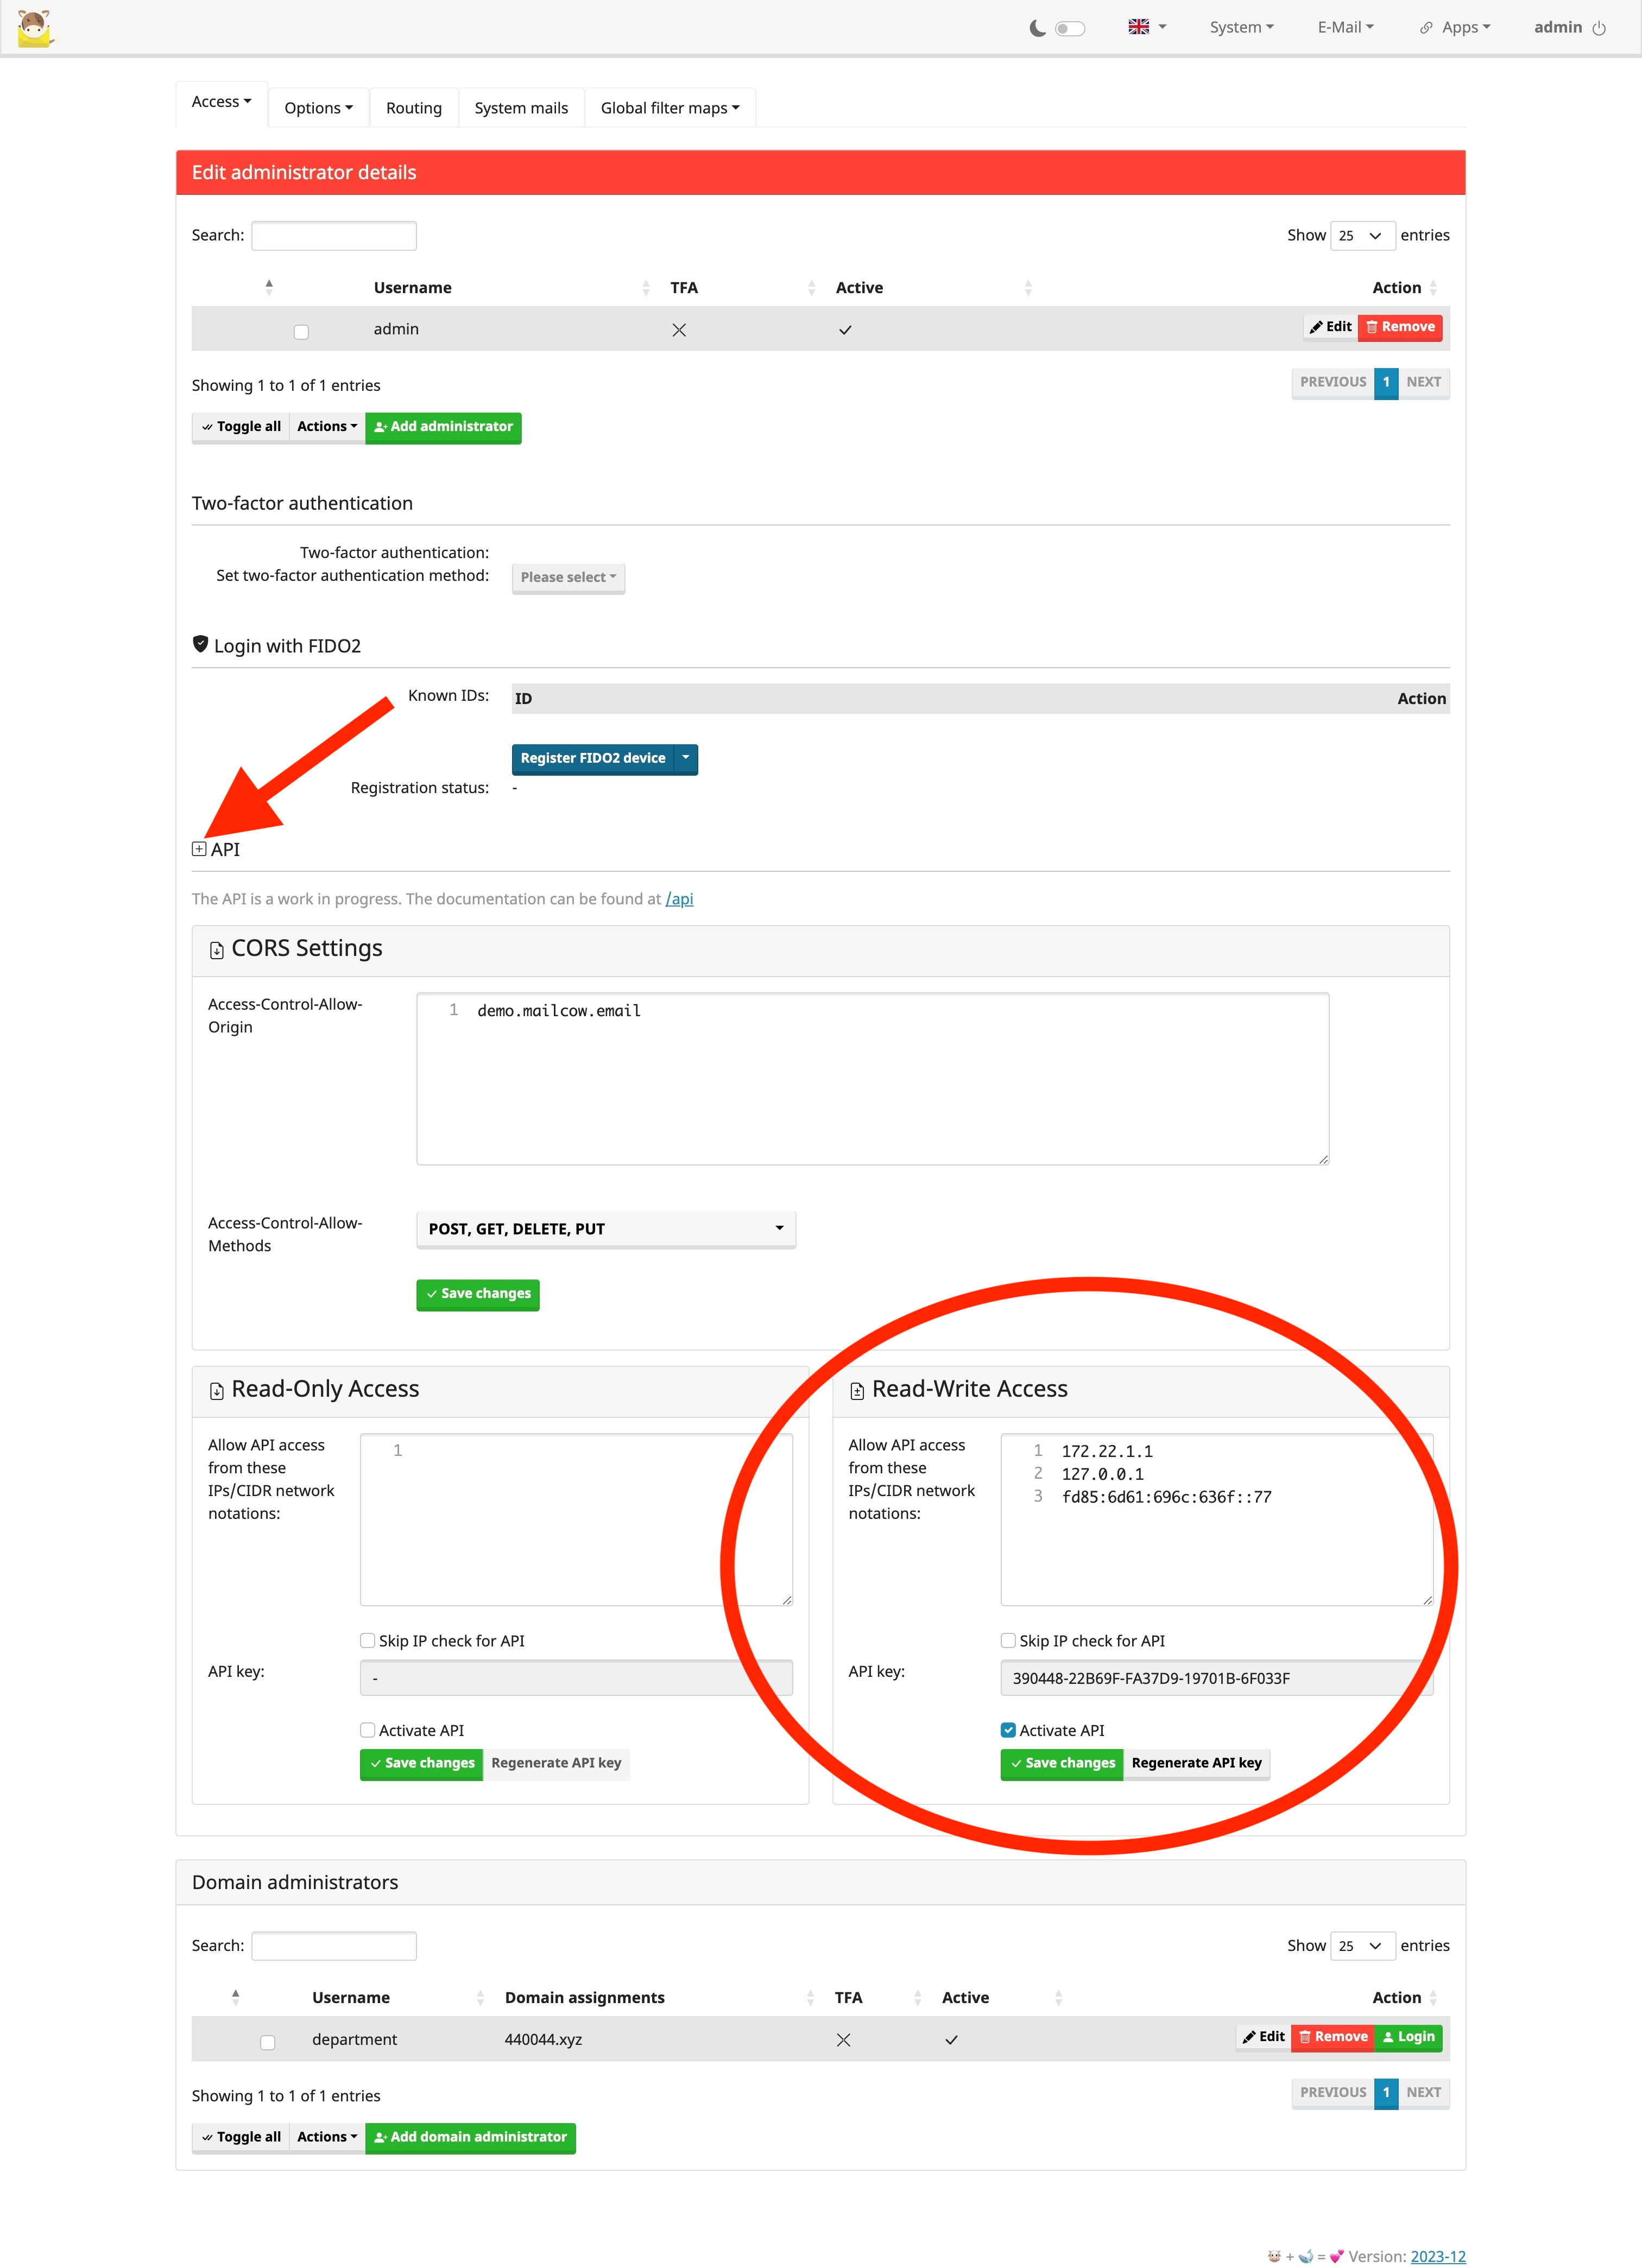
API Section: In the "System" section, find the "API" subsection and click on "+ API" to expand the API options.
-
Setting Up Read-Write Access: In the "Read-Write Access" section, add your WHMCS server IP address or enable "Skip IP check for API".
-
Activating the API: Ensure that the "Activate API" checkbox is checked.
-
Saving Changes: Click on "Save changes". After saving, an API Access Hash / API Key will be displayed. Copy this key for use in the next step.
Part 3: Setting Up the Server in WHMCS
-
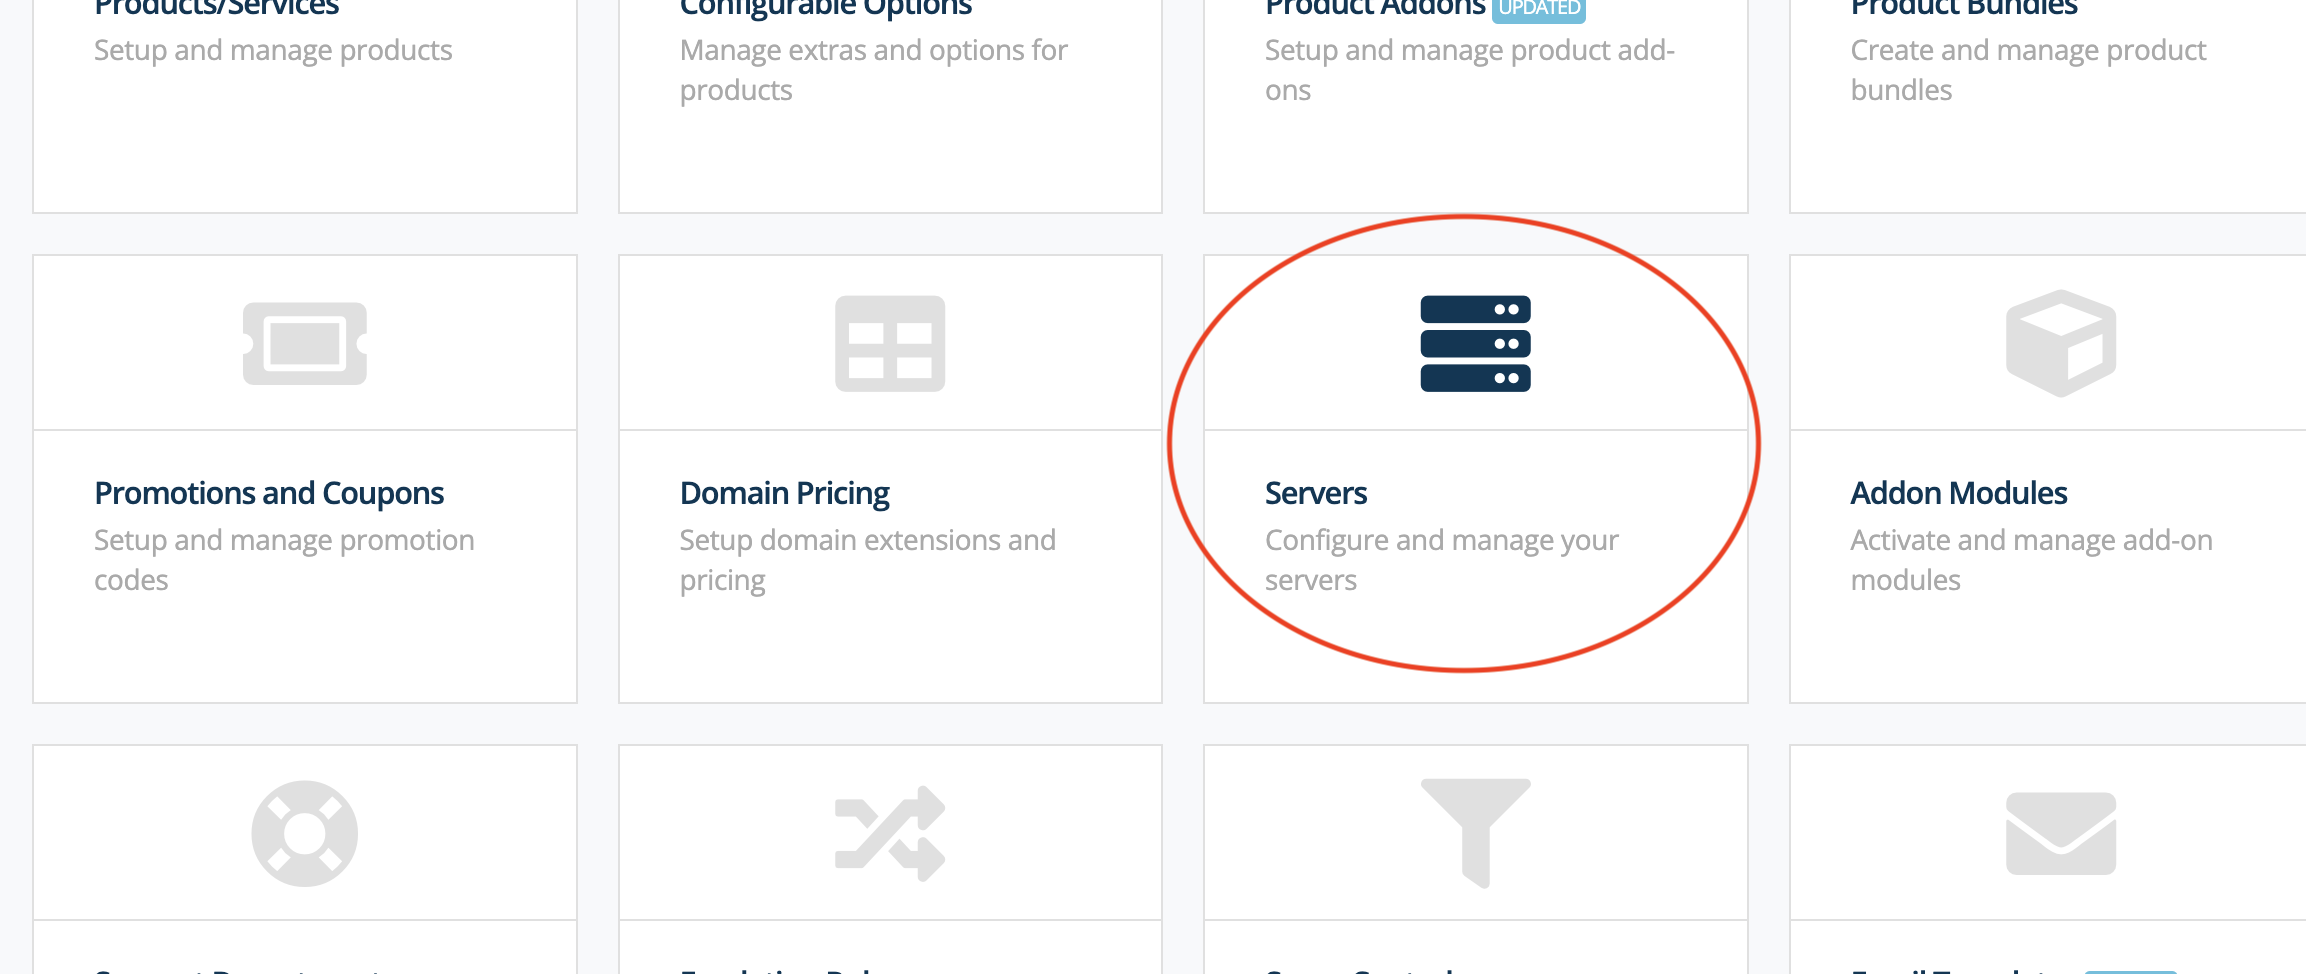
Navigating to Server Settings: In your WHMCS admin panel, navigate to "System Settings" -> "Servers".
-
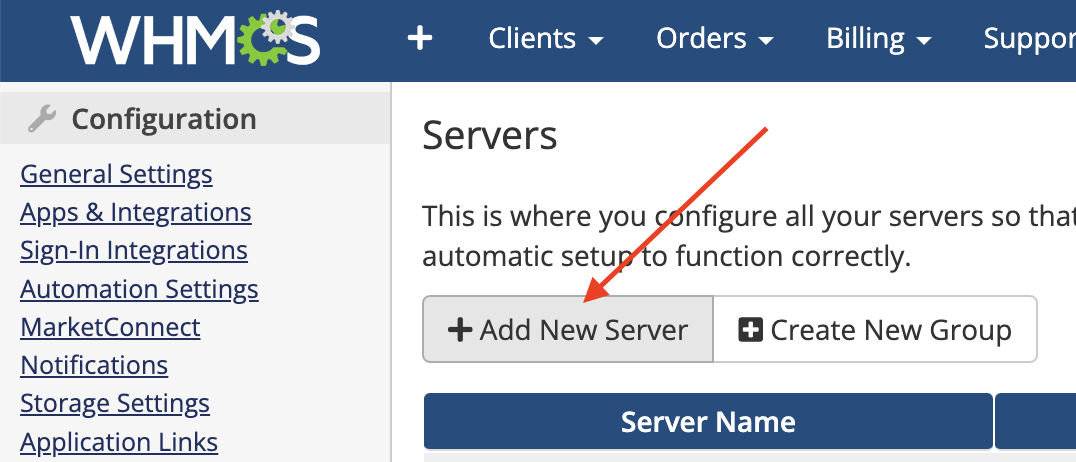
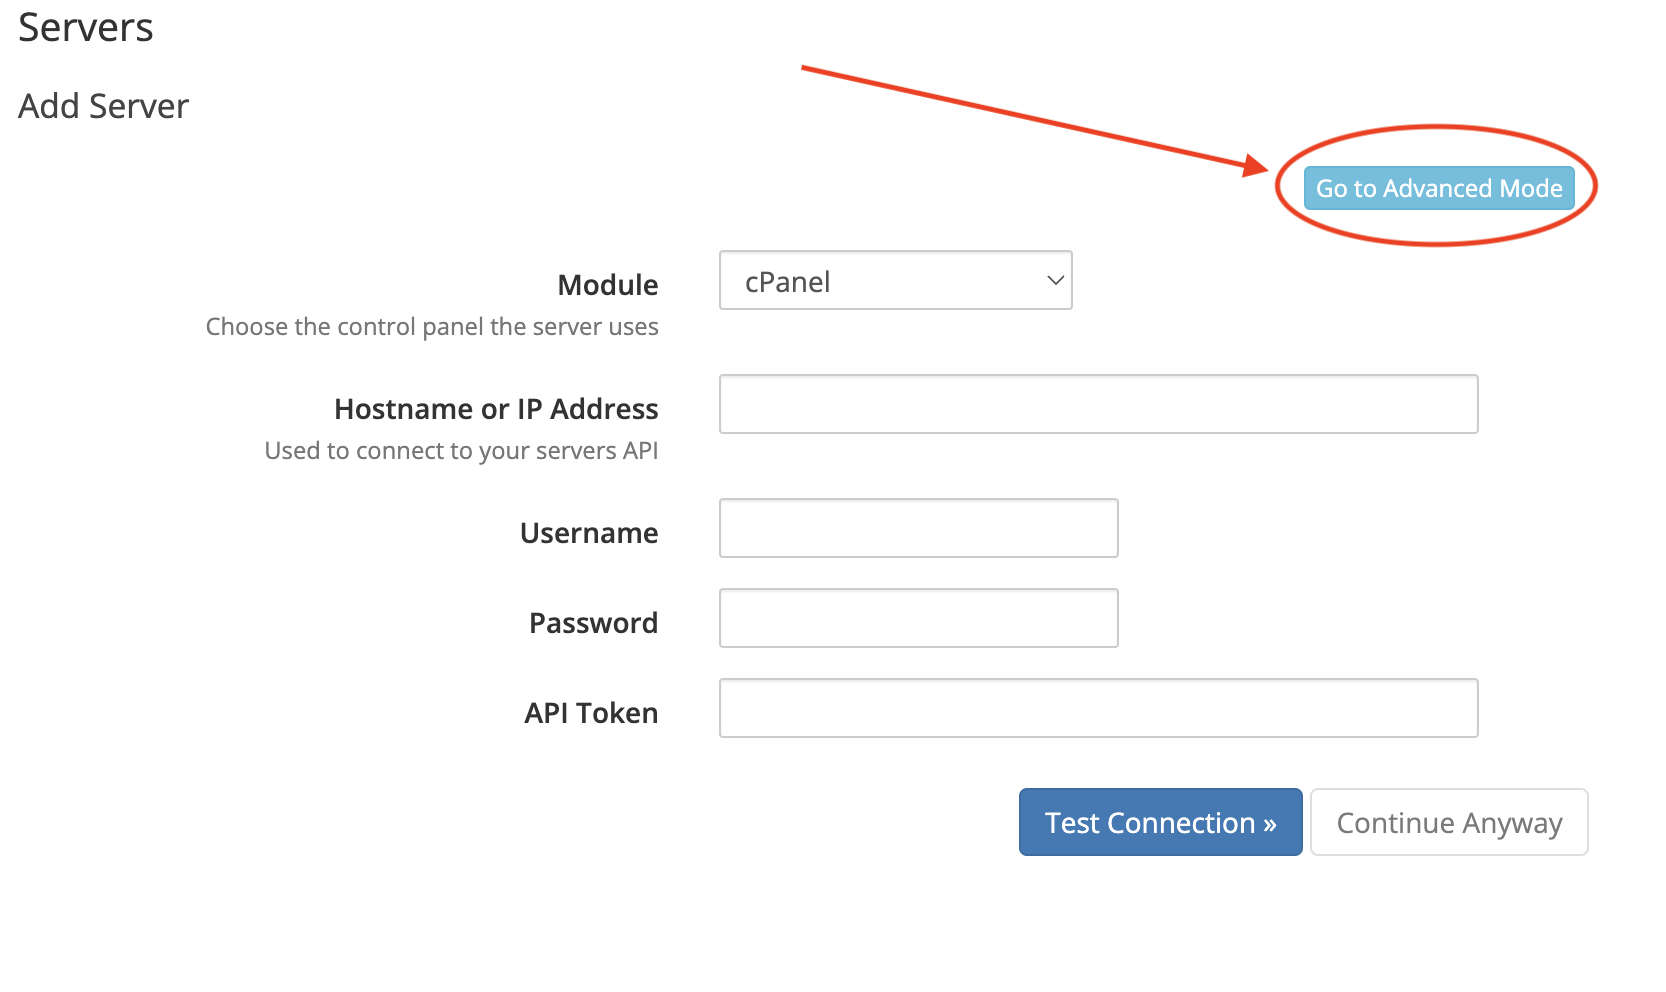
Adding a New Server: Click on the "Add New Server" button, then select "Go to Advanced Mode".
-
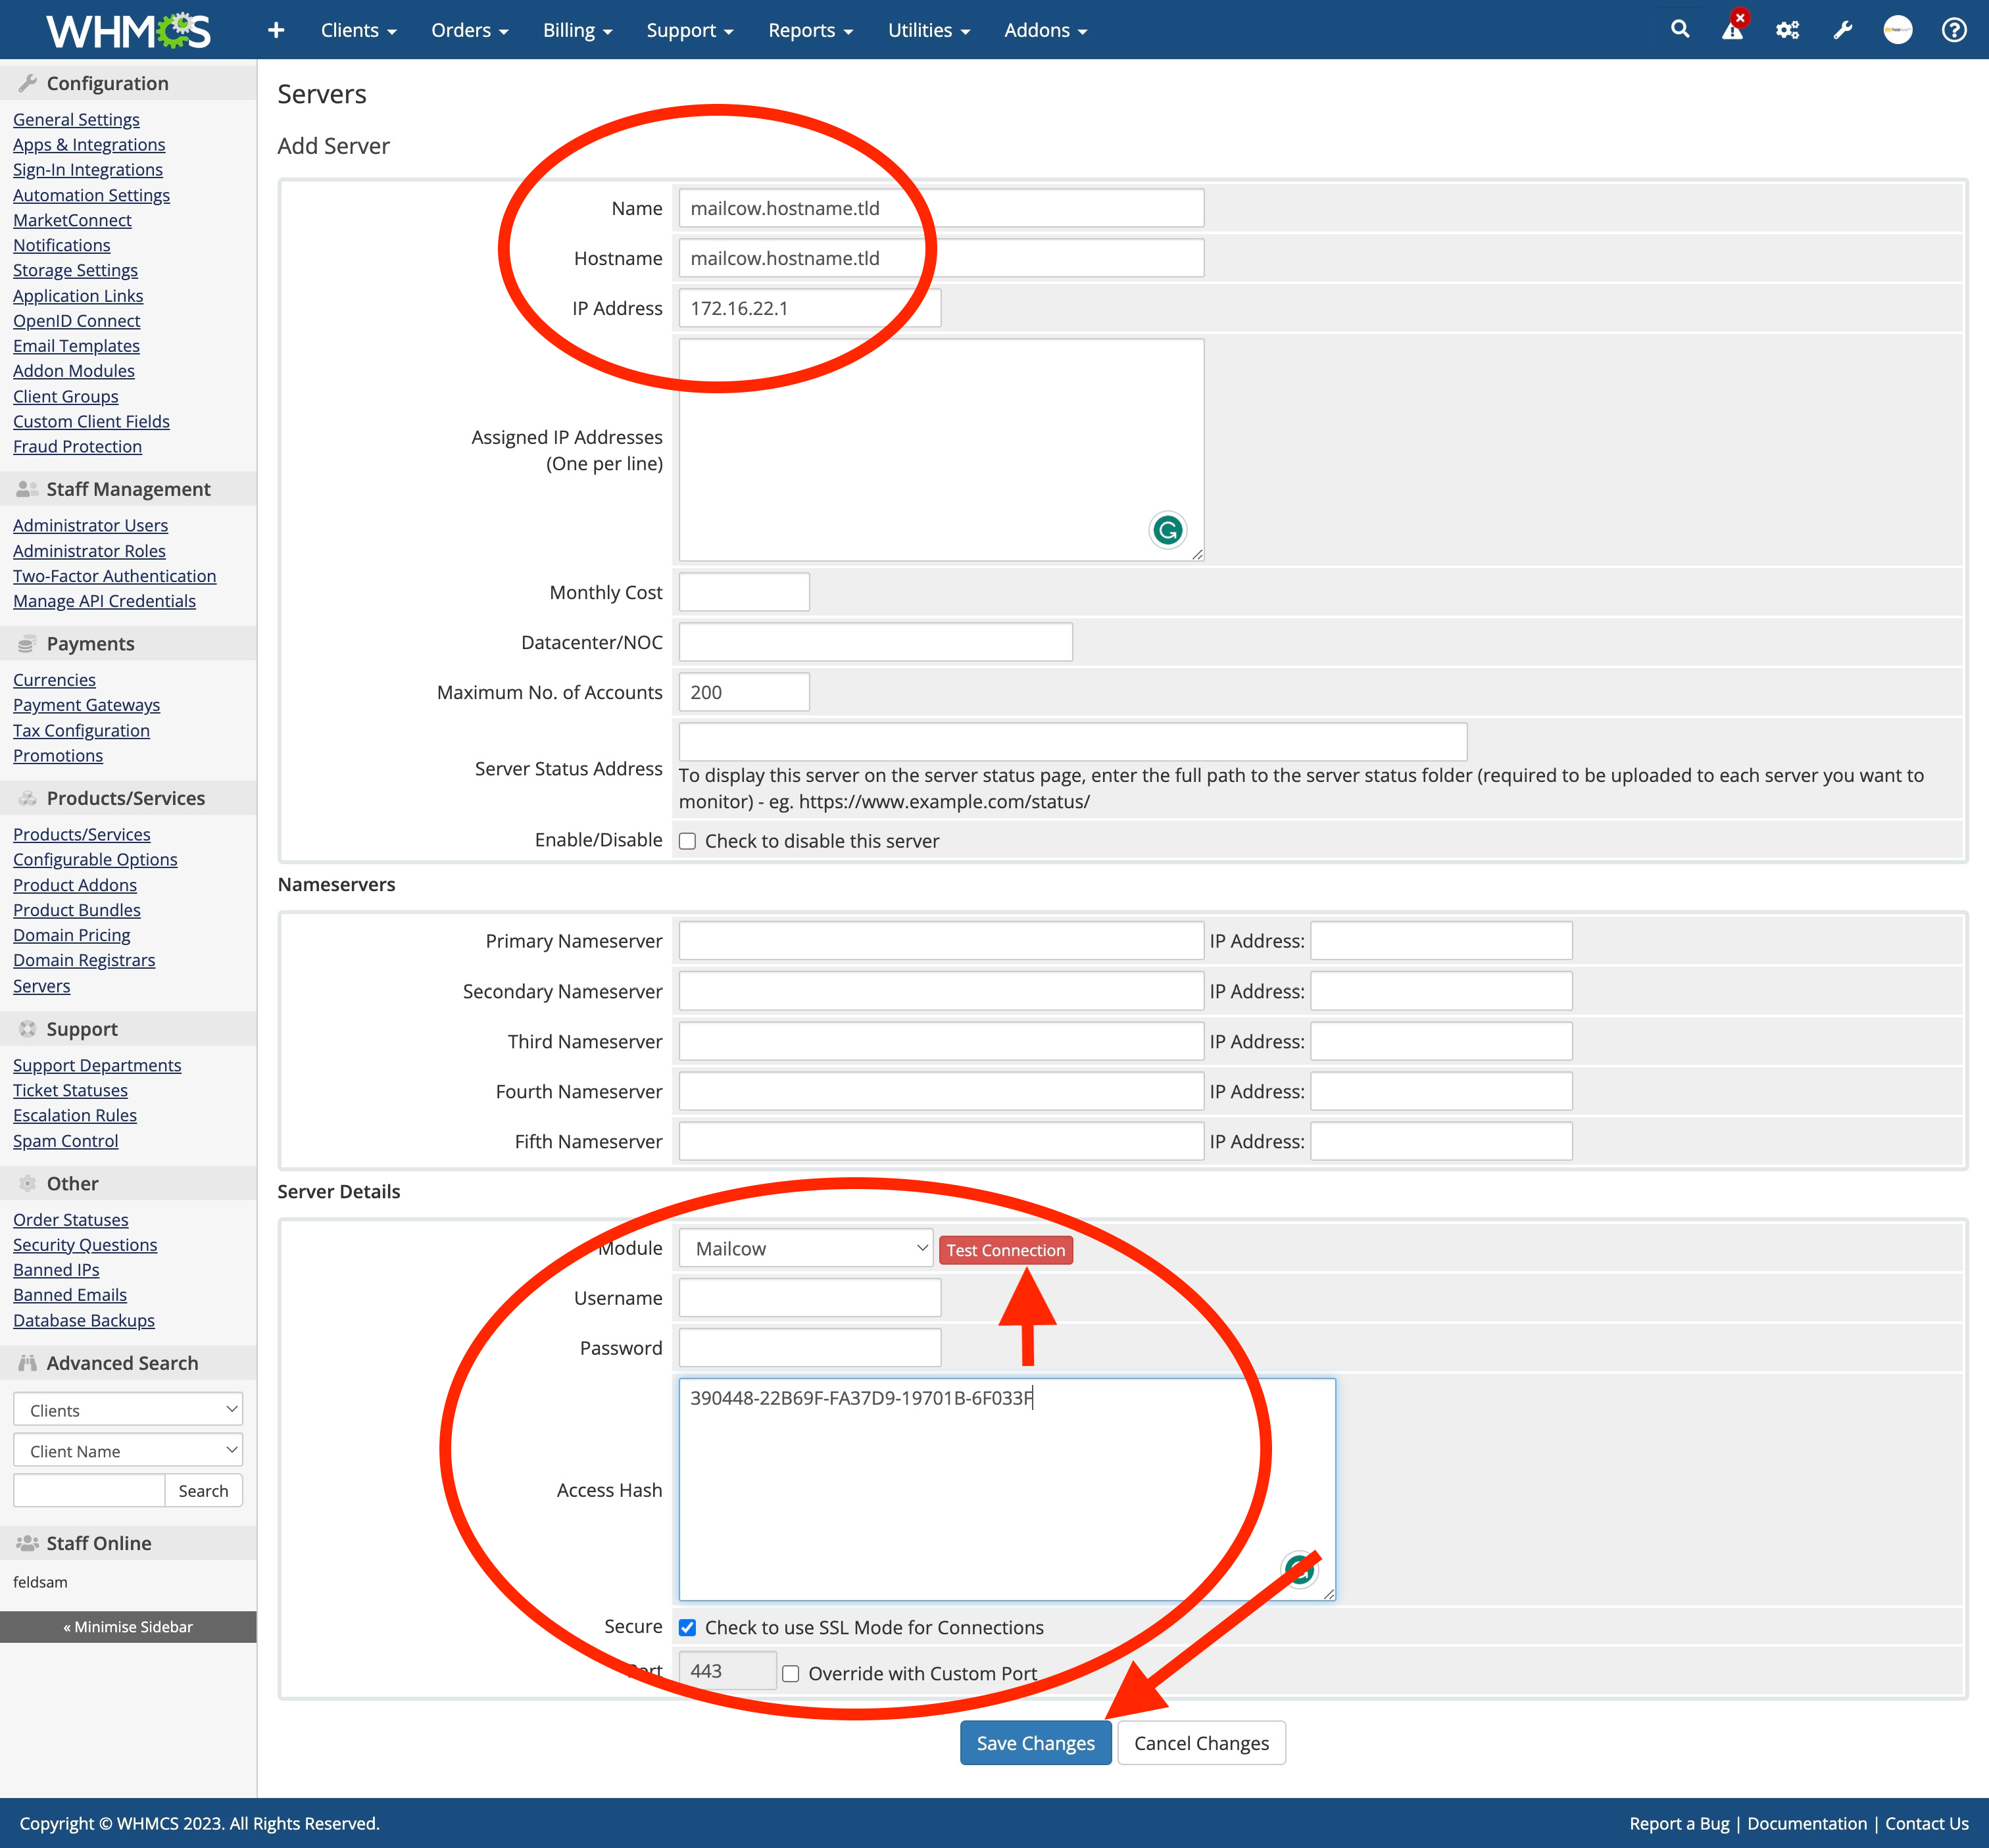
Server Details: Enter the server name, Mailcow server hostname, and IP address.
-
Selecting the Module: Choose "Mailcow" as the module.
-
Entering Mailcow API Key: Input the Mailcow API Key into the "Access Hash" field.
-
Default Settings: Leave the "Secure" and "Port" options at their default settings.
-
Testing the Connection: Click on "Test Connection" to ensure the settings are correct.
-
Saving the Server: If the test is successful, click on "Save Changes".
Your Mailcow module is now set up and ready to use in your WHMCS products.
Part 4: Internationalization - Translating the SSO Button Label
For users operating in multi-language environments, the WHMCS Mailcow module supports internationalization, allowing you to provide a localized experience for your users. One of the key aspects you might want to customize is the label on the Single Sign-On (SSO) button, which navigates users to the mail hosting control panel. Here's how you can translate this label:
-
Identify the Language File: Locate the language file you wish to edit within your WHMCS installation. Typically, these files are found in the
/lang/directory and will be named after the specific language they represent (e.g.,english.phpfor English,french.phpfor French, etc.). -
Add the Custom Label: Open your selected language file and add the following line to it:
$_LANG['Navigate to mailhosting control panel'] = 'Custom Label';Replace
'Custom Label'with the appropriate translation in your target language. This text will be what users see on the SSO button in the client area. -
Repeat for Other Languages: If you support multiple languages, repeat this process for each language file. Ensure that the translation matches the language and context of your users.
-
Save and Upload: After making changes, save the file and upload it back to the appropriate location in your WHMCS installation if you edited it locally.
-
Test the Changes: Once uploaded, navigate to your WHMCS client area in the respective language and verify that the SSO button displays the new label correctly.
By following these steps, you can ensure that users across different languages have a tailored and understandable navigation label for accessing the mail hosting control panel, enhancing the overall user experience.
